PUBG Mobile is one of the most popular battle royale games, celebrated for its fast-paced action and strategic gameplay. While it’s designed for smartphones, many players want to enjoy it on a larger screen—like their Mac. Unfortunately, finding a reliable emulator that works well with Mac M1 devices can be a challenge.
That’s where MuMuPlayer Pro comes in. This powerful Android emulator is fully optimized for Mac with Apple Silicon (M1, M2, M3, M4), offering a native experience with smooth performance. In this guide, we’ll show you exactly how to download and play PUBG Mobile on a Mac M1/M2/M3/M4 using MuMuPlayer Pro.
You’ll get a step-by-step tutorial, learn the best performance settings, and discover keymapping tips for a seamless desktop gaming experience.
How to Install MuMuPlayer Pro on Mac M1/M2/M3/M4
Follow these easy steps to set up MuMuPlayer Pro on your device. This guide is compatible with all Apple Silicon MacBooks, including M1, M2, M3, and M4 models.
Click here to visit the official MuMuPlayer Pro website and download the latest version of the emulator.
Once the download is complete, open the installer and follow the on-screen instructions to finish the installation process.
Installing PUBG Mobile on MuMuPlayer Pro
1. Launch MuMuPlayer Pro:
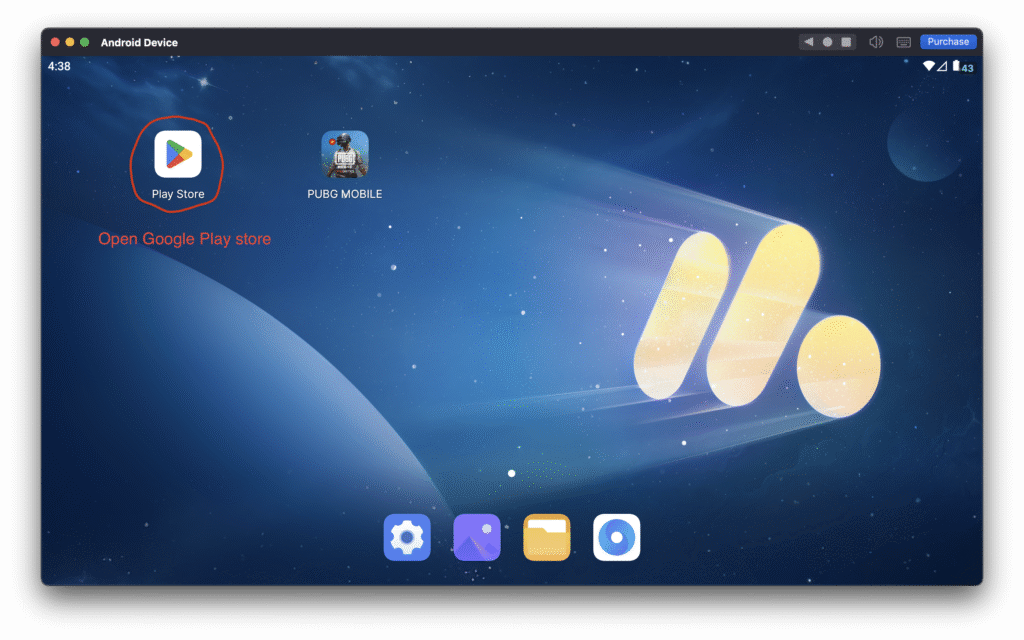
After installation, launch MuMuPlayer Pro from the Applications folder or Launchpad. It runs smoothly on Mac M1 devices thanks to its native Apple Silicon support.
2. Login to Google Play Store:
Inside MuMuPlayer Pro, open the Google Play Store app and sign in with your Google account to access the full library of available apps and games.

3. Search for PUBG Mobile:
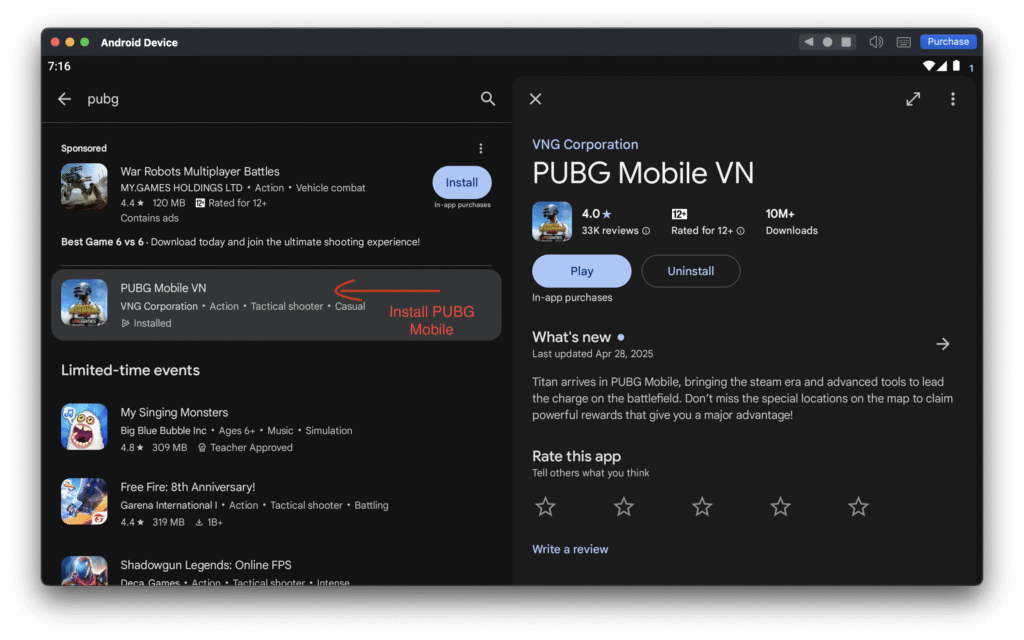
Within the Google Play Store in MuMuPlayer Pro, use the search bar to find PUBG Mobile. Select the game from the search results to open its download page, then install it just like you would on a mobile device.

Once installed, PUBG Mobile will appear on the home screen of MuMuPlayer Pro. You can technically start playing right away, but for a smoother and more immersive experience, it’s important to set up key mapping. This allows you to play more comfortably using your keyboard.
Set Up Key-Mapping to Play PUBG Mobile
1. Access the Key-Mapping Setting:
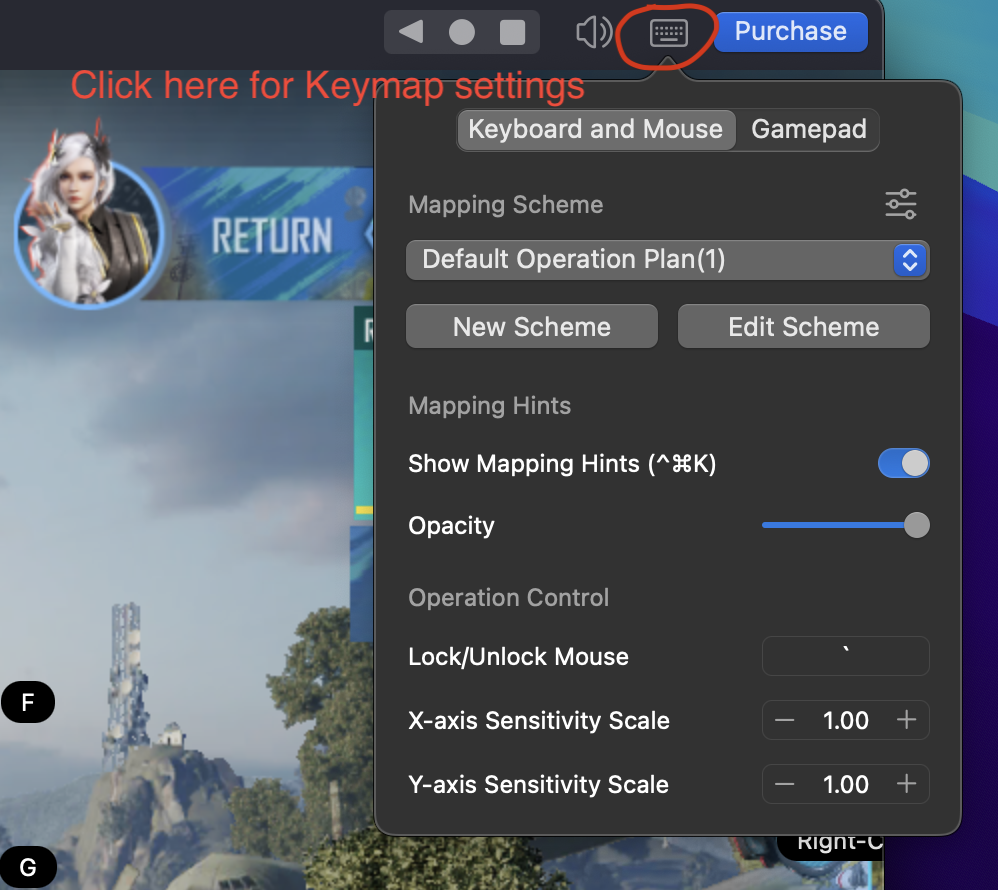
MuMuPlayer Pro comes with a built-in key-mapping tool for both keyboard/mouse and gamepad. You can access it by clicking the keyboard icon on the emulator’s toolbar.

MuMuPlayer Pro offers three default key-mapping schemes that cover the basic game controls. To get started, simply select the first option, Default Operation Plan, and begin using your MacBook keyboard to play.
Tip: Enable Show Mapping Hints to see which keys correspond to in-game actions—perfect for getting familiar with the controls quickly.
2. Customize Key Bindings:
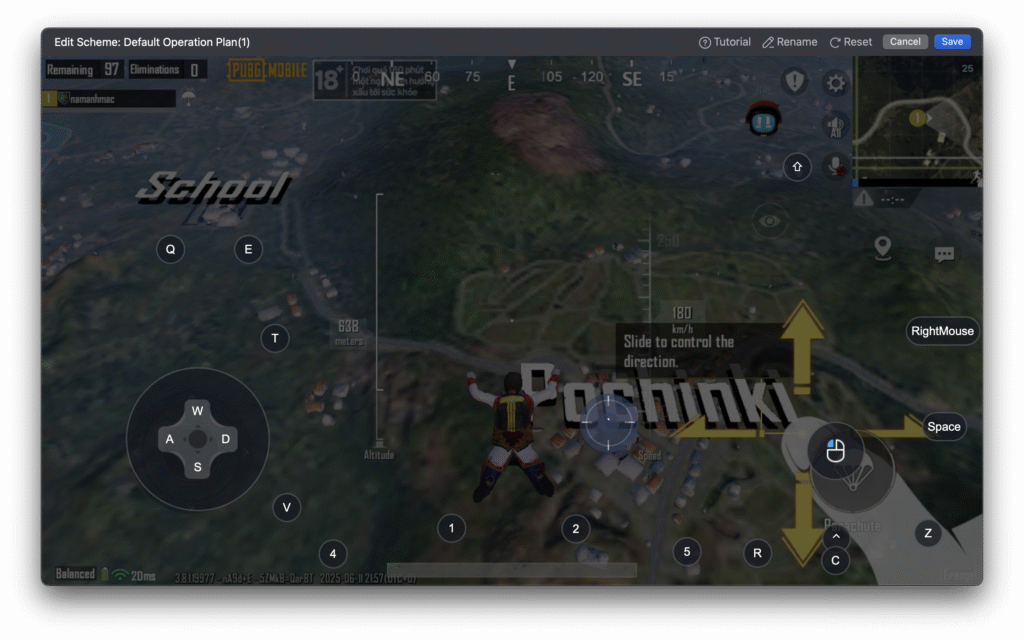
If the default layout doesn’t suit your preferences, you can customize it by clicking Edit Scheme. Simply drag and drop key controls onto the appropriate areas of the game screen.
For example, assign WASD for movement, the left mouse button for shooting, and Spacebar for jumping. To change a key, just click on it and press your desired key—each key should be assigned to one unique action for the best experience.

If an action doesn’t have a key assigned yet, simply right-click to add a new key mapping, then press the key you want to use for that action.
3. Save and Test Key-Mapping:
Once you’re happy with your key-mapping setup, save your configuration and test it by playing a quick match to ensure everything works smoothly. If you’d like to use my custom keymap for PUBG Mobile, you can download it below and import it directly into MuMuPlayer Pro:
Tip: For a better gaming experience, press the ` (backtick) key on your keyboard to lock the mouse before starting a game.
This key-mapping setup method isn’t just for PUBG Mobile—it can be applied to many other Android games available on MuMuPlayer Pro. Let’s explore more titles you can enjoy on your Mac!