Installing NordVPN on macOS is simple, and once installed, it gives you a powerful way to protect your privacy and secure your internet connection.
NordVPN for Mac encrypts your traffic and routes it through secure servers, helping hide your real IP address and protect your data from hackers, internet providers, and other third parties.
Download NordVPN for MacThe app is especially useful when using public Wi-Fi networks, where your internet activity could otherwise be exposed. With NordVPN, your browsing, downloads, and online communication stay protected.
NordVPN’s macOS app is lightweight, easy to use, and gives you access to thousands of servers worldwide. These servers allow you to mask your location and access content that may be restricted in your region.
In this guide, you’ll learn how to download and install the NordVPN version you prefer on macOS in just a few simple steps.
System Requirements for macOS
Before installing NordVPN, make sure your Mac meets these requirements:
- macOS 12 or newer recommended
- Compatible with Intel and Apple Silicon Macs (M1, M2, M3)
- At least 200MB of free storage
- Active internet connection
If your Mac runs an older macOS version, you may need to install an earlier release of the app.
How to Set Up NordVPN on Mac
Installing NordVPN on macOS is quick and straightforward. Follow the steps below to download, install, and connect NordVPN.
1. Download and Install NordVPN on Mac
To get started, you need an active NordVPN subscription.
Visit the official NordVPN download page and click the Download App button

Once the file finishes downloading, open your Downloads folder and locate the installation package. Double-click the NordVPN.pkg file to begin the setup.
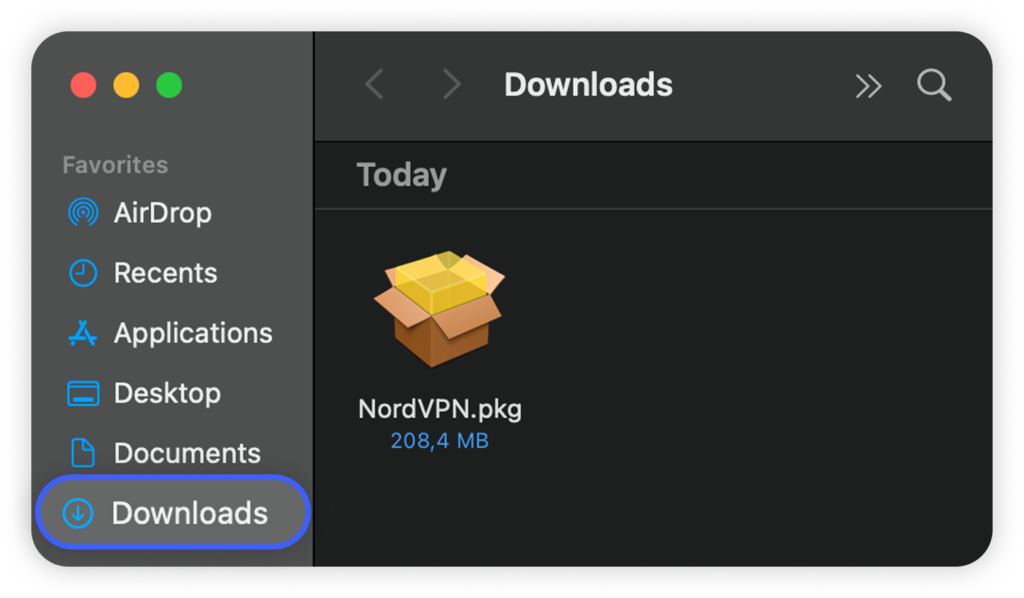
NOTE: Make sure the installer is saved directly on your device rather than inside a cloud-synced folder such as Dropbox or iCloud Drive, as this can sometimes cause installation issues.
When the installer window appears, click Continue, then choose Install.
Your Mac will ask for your password or Touch ID to approve the process. After authorization, the installation will run automatically. When it finishes, click Close.
2. Log In & Connect
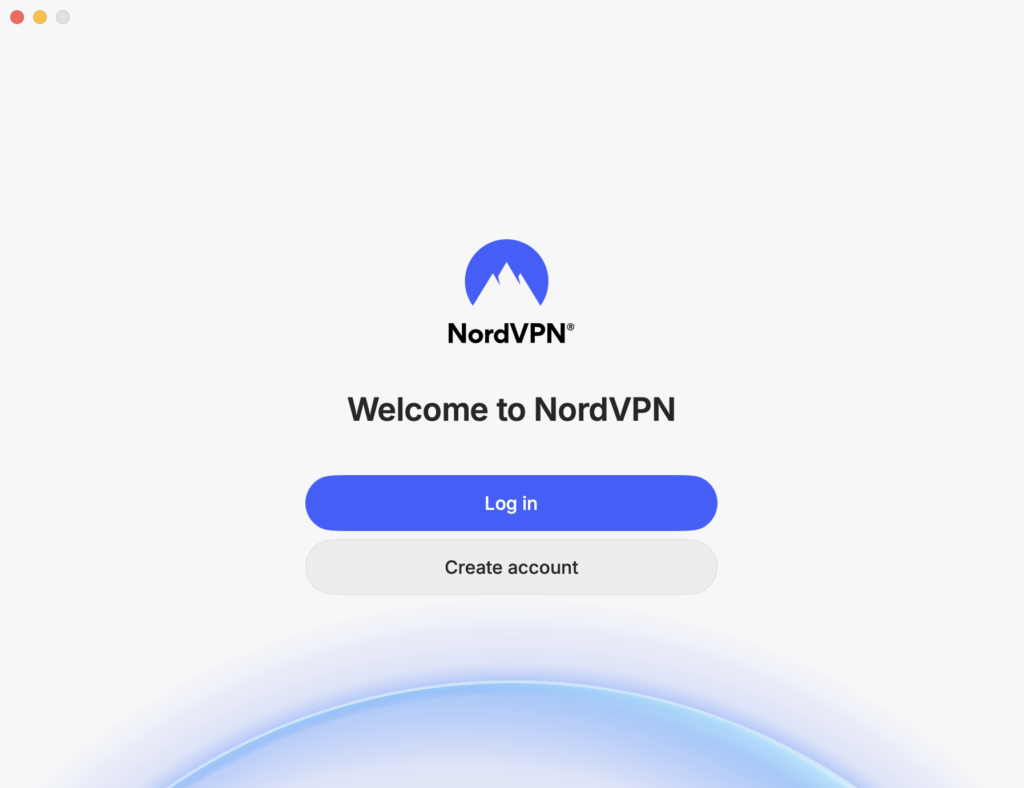
To open the app, press Command (⌘) + Space, type NordVPN, and press enter to launch it.
A login screen will appear. If you already have an account, select Log In. If not, choose Create account and follow the steps to register.
You may be redirected to a secure login page in your browser.
Enter your email and password, or sign in using Apple, Google, or another supported method.
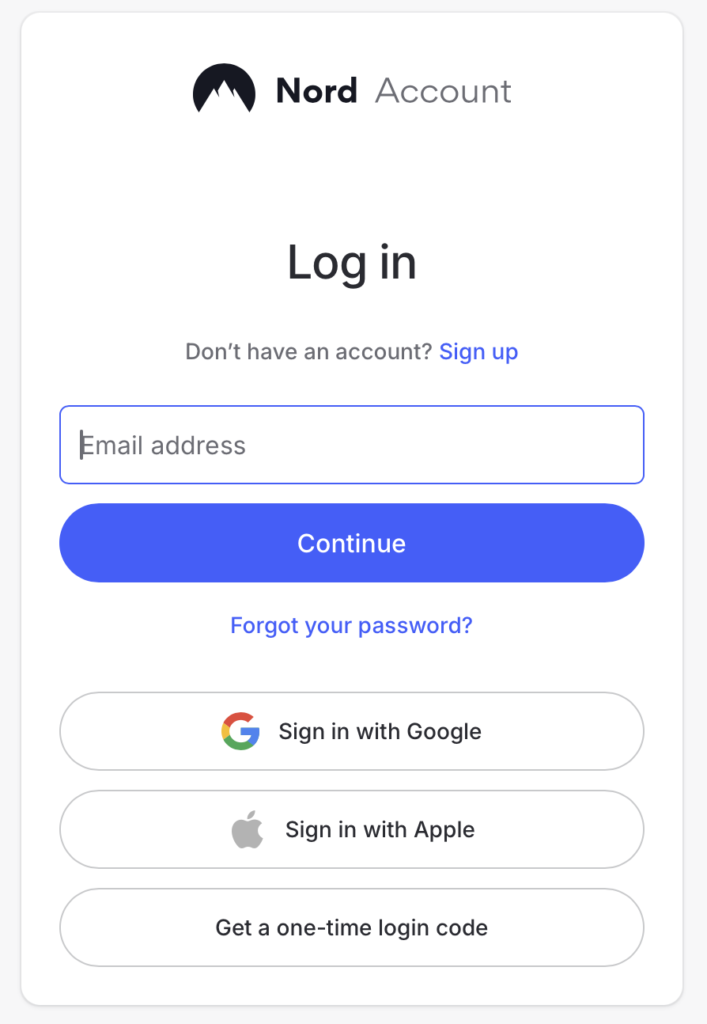
After signing in, confirm the prompt to return to the NordVPN app.
Once inside the app, you can connect in two simple ways:
- For the fastest option, click Secure my connection to automatically connect to the best available server.
- If you want a specific region, use the search bar to type a country name or scroll through the server list and select one manually.
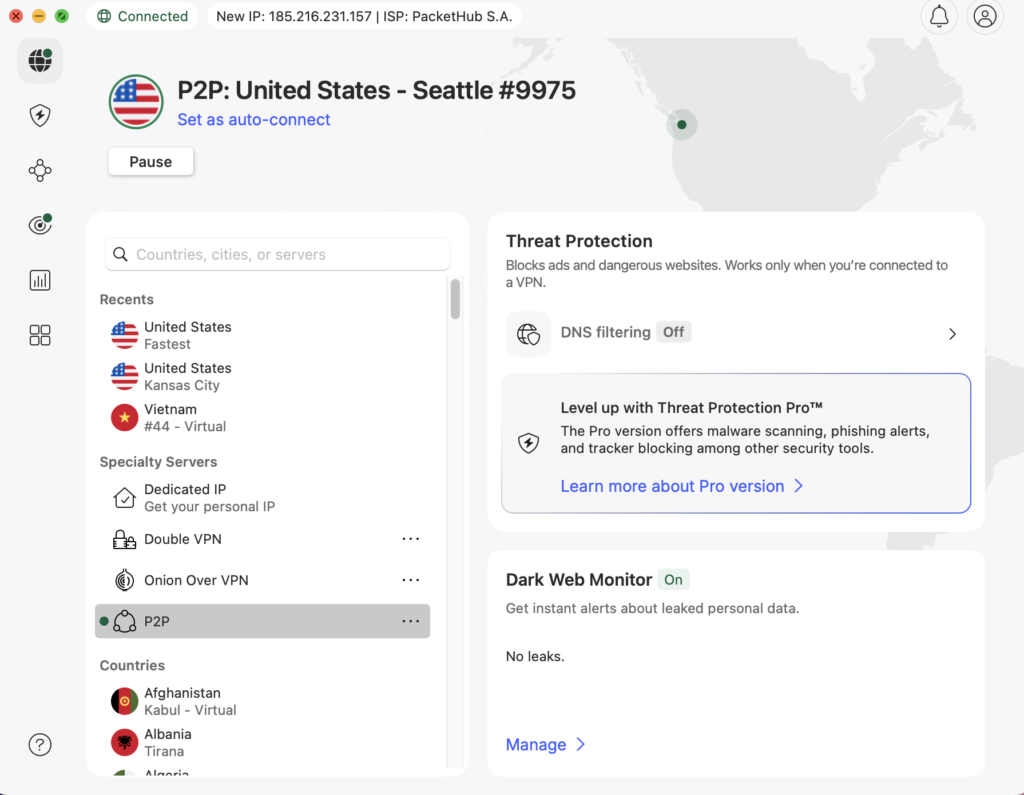
When the app shows that you are connected, your internet traffic is encrypted and your Mac is protected.
NordVPN Features on macOS
The Mac version includes all major NordVPN tools:
- Threat Protection for blocking malware and trackers
- Kill Switch to stop traffic if VPN disconnects
- Meshnet for secure remote device access
- Split tunneling (available on certain versions)
- Auto-connect for trusted Wi-Fi networks
These features help keep your Mac safe whether you’re working, streaming, or traveling.
Is NordVPN Safe for Mac?
Yes. NordVPN uses AES-256 encryption, a strict no-logs policy, and secure protocols like NordLynx.
The app is regularly updated and audited for security, making it one of the safest VPN options for macOS users.
Why Won’t NordVPN Connect on My Mac?
If NordVPN isn’t connecting on your Mac, don’t worry — the issue is usually easy to fix. Here are the most common causes and how to solve them:
- Check Your Internet Connection: Make sure your internet is working before launching NordVPN. Try opening a website first. If your connection seems unstable, restart your router, reconnect to Wi-Fi or Ethernet, and try again. If the problem continues, you may need to contact your ISP.
- Try a Different Server: Sometimes a server may be overloaded or temporarily unavailable. Simply disconnect and choose another location — this often resolves connection issues instantly.
- Change the VPN Protocol: Connection problems can sometimes be caused by the selected protocol. NordVPN offers three options on macOS: OpenVPN (TCP), OpenVPN (UDP), and NordLynx. Switching between them can help. In most cases, NordLynx is the best choice because it provides the fastest speeds while keeping your connection secure.
- Disable Antivirus or Firewall Temporarily: Security software can occasionally block VPN traffic. Try disabling your antivirus or firewall briefly to see if it’s interfering with NordVPN.
- Check That Required Ports Are Open: Some networks or ISPs block certain ports used by VPN services. NordVPN typically requires UDP port 1194 or TCP port 443. Make sure these ports aren’t restricted on your router or network.
- Contact NordVPN Support: If none of the fixes above work, reach out to NordVPN’s support team. Their 24/7 live chat can help diagnose the issue and guide you through advanced troubleshooting.
FAQs
Why Is the NordVPN Application Not Opening on macOS?
How Do I Download NordVPN on Mac Without App Store?
If the main site is blocked in your region, you may request NordVPN mirror links to access the installer safely.
Does NordVPN Work With Safari?
Conclusion
You’ve now successfully installed NordVPN, completed the setup, and connected it on your Mac. As you can see, the whole process is simple and only takes a few minutes.
If you’re still thinking about whether NordVPN is worth it, this is a great time to try it.
Make sure to take advantage of our NordVPN discount deals to save on your first purchase.
And the best part? NordVPN offers a 30-day money-back guarantee, so you can request a full refund if you’re not satisfied — no hassle, no questions asked.