Opening Shizuku only to see “Shizuku is not running” is one of the most common speed bumps new users hit — usually right after installing an app that needs Shizuku permission. The good news: fixing it doesn’t require rooting your phone or plugging into a computer. Everything can be done directly from your Android device using Wireless Debugging.
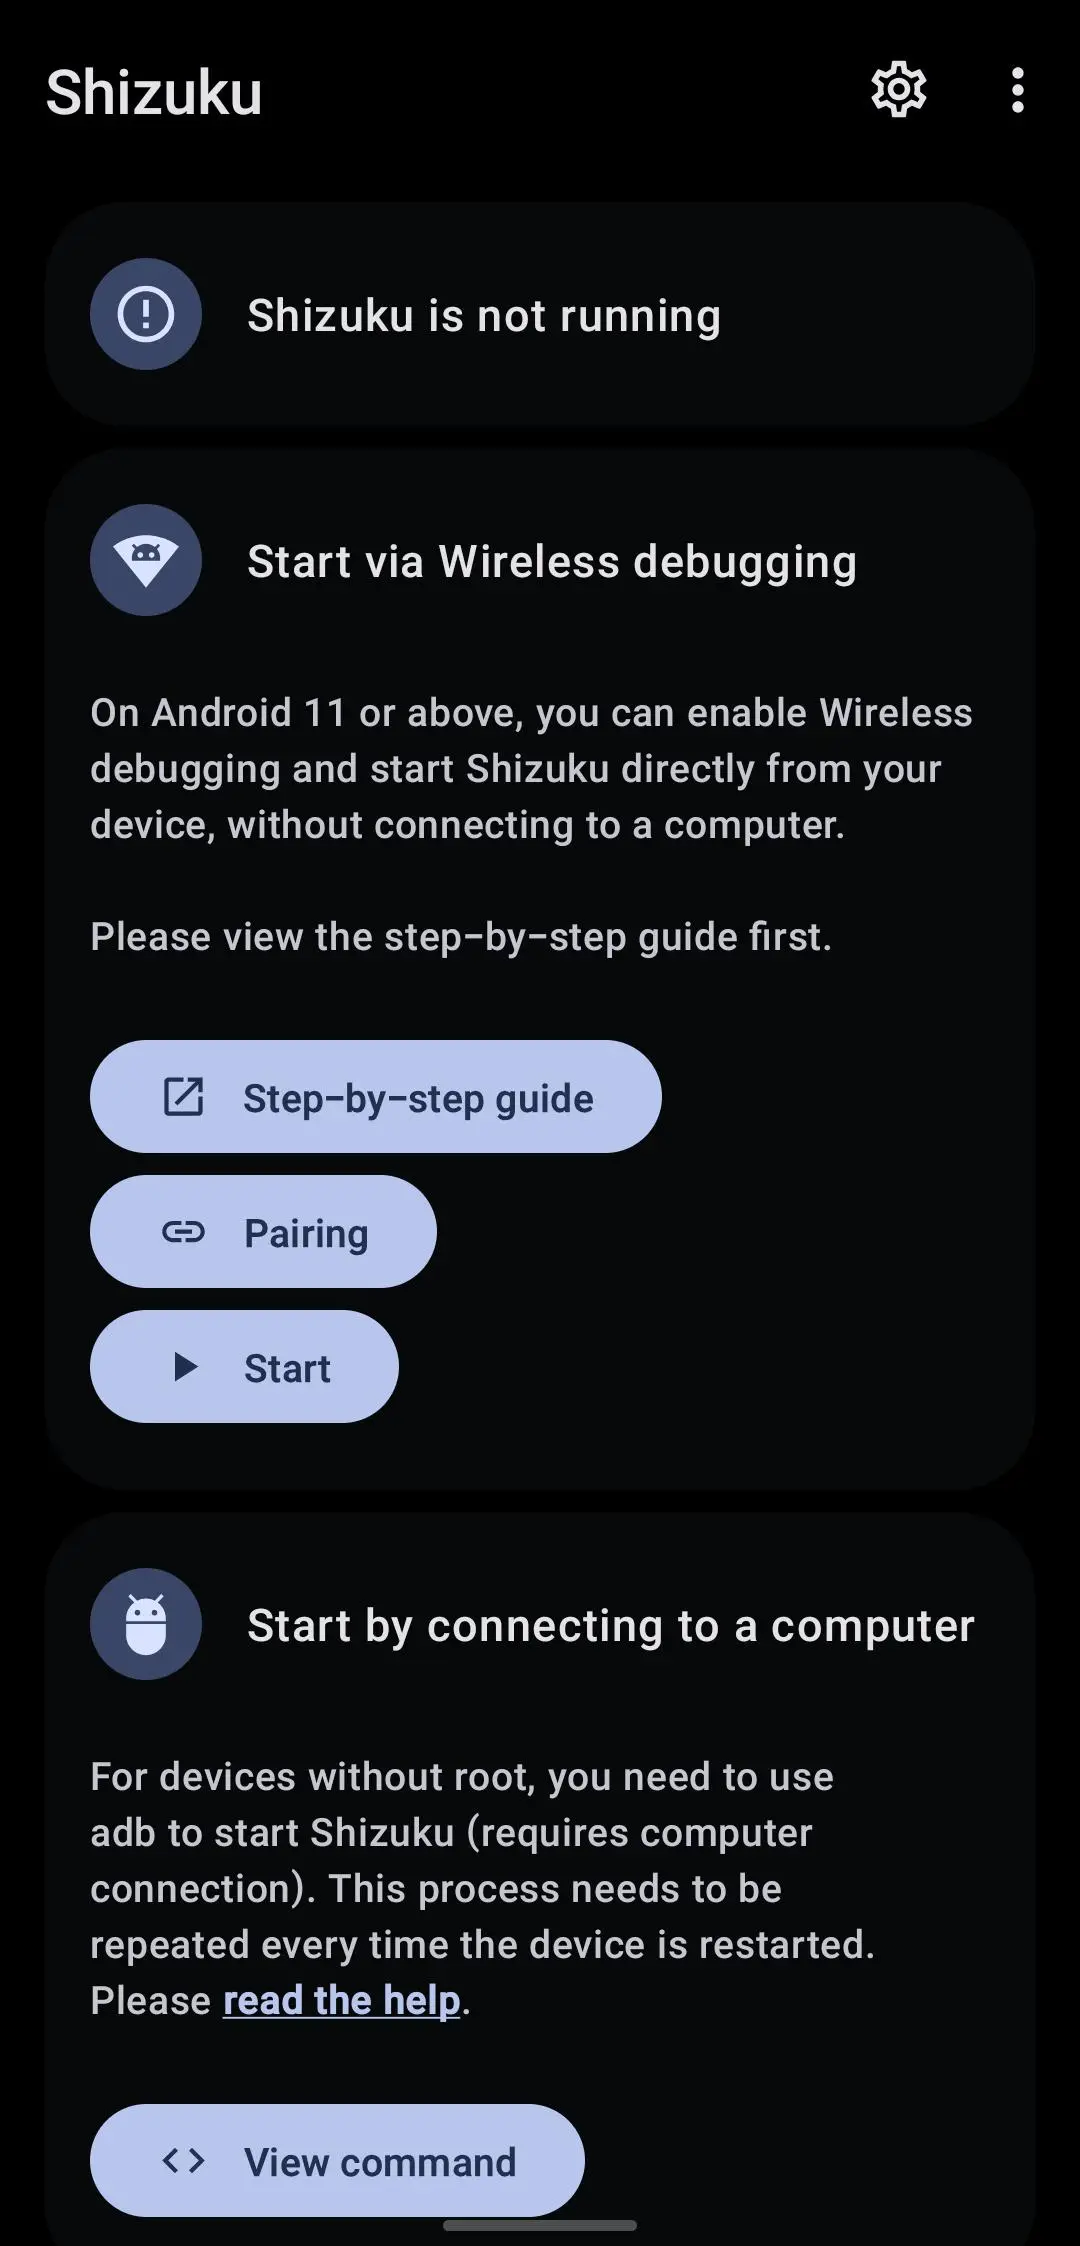
This guide walks through exactly why the error shows up and how to get Shizuku running again, step by step, entirely from your phone.
- Why Does Shizuku Show “Not Running”?
- What You’ll Need
- Step 1: Connect to Wi-Fi
- Step 2: Enable Developer Options
- Step 3: Enable USB and Wireless Debugging
- Step 4: Pair Shizuku via Wireless Debugging
- Step 5: Start Shizuku
- Apps That Use Shizuku Permission
- Important: Shizuku Stops After Reboot
- More Fixes for Common Problems
- Frequently Asked Questions
- Conclusion
1 Why Does Shizuku Show “Not Running”?
Shizuku doesn’t run automatically in the background the way a normal app does — it has to be manually started so it can act as a bridge granting other apps elevated, ADB-level permissions. If that background service isn’t currently active, the app simply reports “Shizuku is not running”.
This typically happens for one of a few reasons: Shizuku was never started in the first place, Wireless Debugging isn’t enabled, the phone was recently restarted, notification permission was denied (blocking the pairing prompt), or the pairing process wasn’t completed properly. On a non-rooted device, starting it manually through Wireless Debugging is the standard fix.
2 What You’ll Need
| Requirement | Why It Matters |
|---|---|
| Shizuku app installed | You need the app itself before you can start its service |
| Stable Wi-Fi connection | Wireless Debugging depends on Wi-Fi — mobile data won’t work for pairing |
| Developer Options enabled | Wireless Debugging lives inside Developer Options |
| Android version with Wireless Debugging support | Generally Android 11 and above |
No root access and no PC are required for this method — everything happens directly on your phone.
Connect your Android phone to a stable Wi-Fi network before doing anything else. Wireless Debugging relies on Wi-Fi to start the Shizuku service without a computer — if the connection drops mid-process, pairing can fail or Shizuku may not start correctly. Mobile data isn’t needed here; a normal Wi-Fi connection is enough.
- Open Settings → About Phone.
- Find Build Number (on some phones this is under About Phone → Software Information).
- Tap Build Number 7 times.
- Enter your lock screen password, PIN, or pattern if prompted.
- You should see a message like “You are now a developer” or “Developer mode has been enabled.”
- Go to Settings → Developer Options (on some phones: Settings → System → Developer Options).
- Scroll down and enable USB Debugging. Tap OK or Allow on the warning popup.
- Scroll further and enable Wireless Debugging. Tap Allow on the confirmation popup.
Even though this method uses no USB cable or computer, USB Debugging still needs to be enabled as part of Shizuku’s setup process on most devices.
- Open the Shizuku app — it will show “Shizuku is not running,” which is expected at this point.
- Tap the Pairing option inside Shizuku.
- Allow notification permission if asked — Shizuku uses a notification to complete pairing, so denying this will block the process.
- Keep Shizuku running in the background (don’t fully close it from recent apps).
- Go to Settings → Developer Options → Wireless Debugging, tap into it, then tap Pair device with pairing code.
- A 6-digit pairing code will appear — keep this screen open.
- Open the Shizuku notification that appears once a pairing service is found, enter the 6-digit code, and tap Send.
If everything matches up, you’ll see a message confirming pairing was successful.
- Go back to the Shizuku app.
- Tap the Start button that now appears.
- Wait a few seconds — the pairing window should close automatically.
- Open Shizuku again to confirm it now shows as running instead of “not running.”
Once this shows successfully, any app that needs Shizuku permission can now request and receive access normally.
8 Apps That Use Shizuku Permission
Once Shizuku is running, several categories of apps can request its elevated permissions to unlock features regular Android apps can’t access, including:
- App management and permission manager tools
- Bloatware removal utilities
- Android customization and system tweak tools
- Automation apps that need system-level access
When a supported app asks for Shizuku permission, only allow it if you trust that app, since it’s requesting elevated system-level access.
9 Important: Shizuku Stops After Reboot
On non-rooted devices, Shizuku cannot start itself automatically after a restart. Every time you reboot your phone, you’ll need to repeat the Wireless Debugging start process (usually just re-opening Wireless Debugging and tapping Start again in Shizuku — full re-pairing isn’t always required). Rooted devices can be configured to auto-start Shizuku on boot, but for most users, starting it manually each time is simply part of the routine.
10 More Fixes for Common Problems
Pairing Notification Not Showing
Go to Settings → Apps → Shizuku → Notifications and make sure notifications are allowed. Also check that Shizuku isn’t restricted by aggressive battery optimization, which can prevent the pairing notification from appearing at all.
Pairing Code Not Working
Double-check you’re entering the current 6-digit code — it changes every time you reopen the pairing screen, so an old code won’t work. If pairing fails, close the pairing window, tap Pair device with pairing code again, and enter the fresh code.
Wireless Debugging Option Missing
If Wireless Debugging doesn’t appear in Developer Options, your device or Android version may not support it. Try searching for “Wireless Debugging” directly in the Settings search bar first — if it’s genuinely unavailable, you’ll need the PC-based ADB method instead.
Shizuku Starts But Stops Again
Go to Settings → Apps → Shizuku → Battery and set it to Unrestricted or Don’t optimize. Avoid swiping Shizuku away from recent apps right after starting it. Some phones with very aggressive battery management may still stop it eventually, requiring a manual restart.
11 Frequently Asked Questions
12 Conclusion
Here’s the quick recap of fixing “Shizuku is not running”:
- Connect to Wi-Fi first — Wireless Debugging needs it
- Enable Developer Options and both USB + Wireless Debugging toggles
- Pair Shizuku using the 6-digit code from Wireless Debugging
- Tap Start inside Shizuku to activate the service
- Repeat after every reboot — this is normal on non-rooted devices
Once Shizuku shows as running, any supported app can request its permission normally. If you ever see “not running” again after restarting your phone, just repeat the Wireless Debugging start process — it’s a routine part of using Shizuku without root.
🔓 Shizuku Running Again?
Now that it’s active, check out our full Shizuku setup guide for more on granting permissions to other apps.