Scrcpy is a free, open-source tool that lets you mirror and fully control your Android phone from a computer — and while most people start out using it with a USB cable, it works just as well entirely over Wi-Fi once it’s set up. No cable tethered to your desk, no third-party account, and no app installed on your phone beyond what’s already built into Android.
This guide walks through the exact steps to connect Scrcpy wirelessly using ADB’s wireless debugging pairing — the same official method built into Android 11 and later — from finding your phone’s IP address to running your first wireless mirroring session.
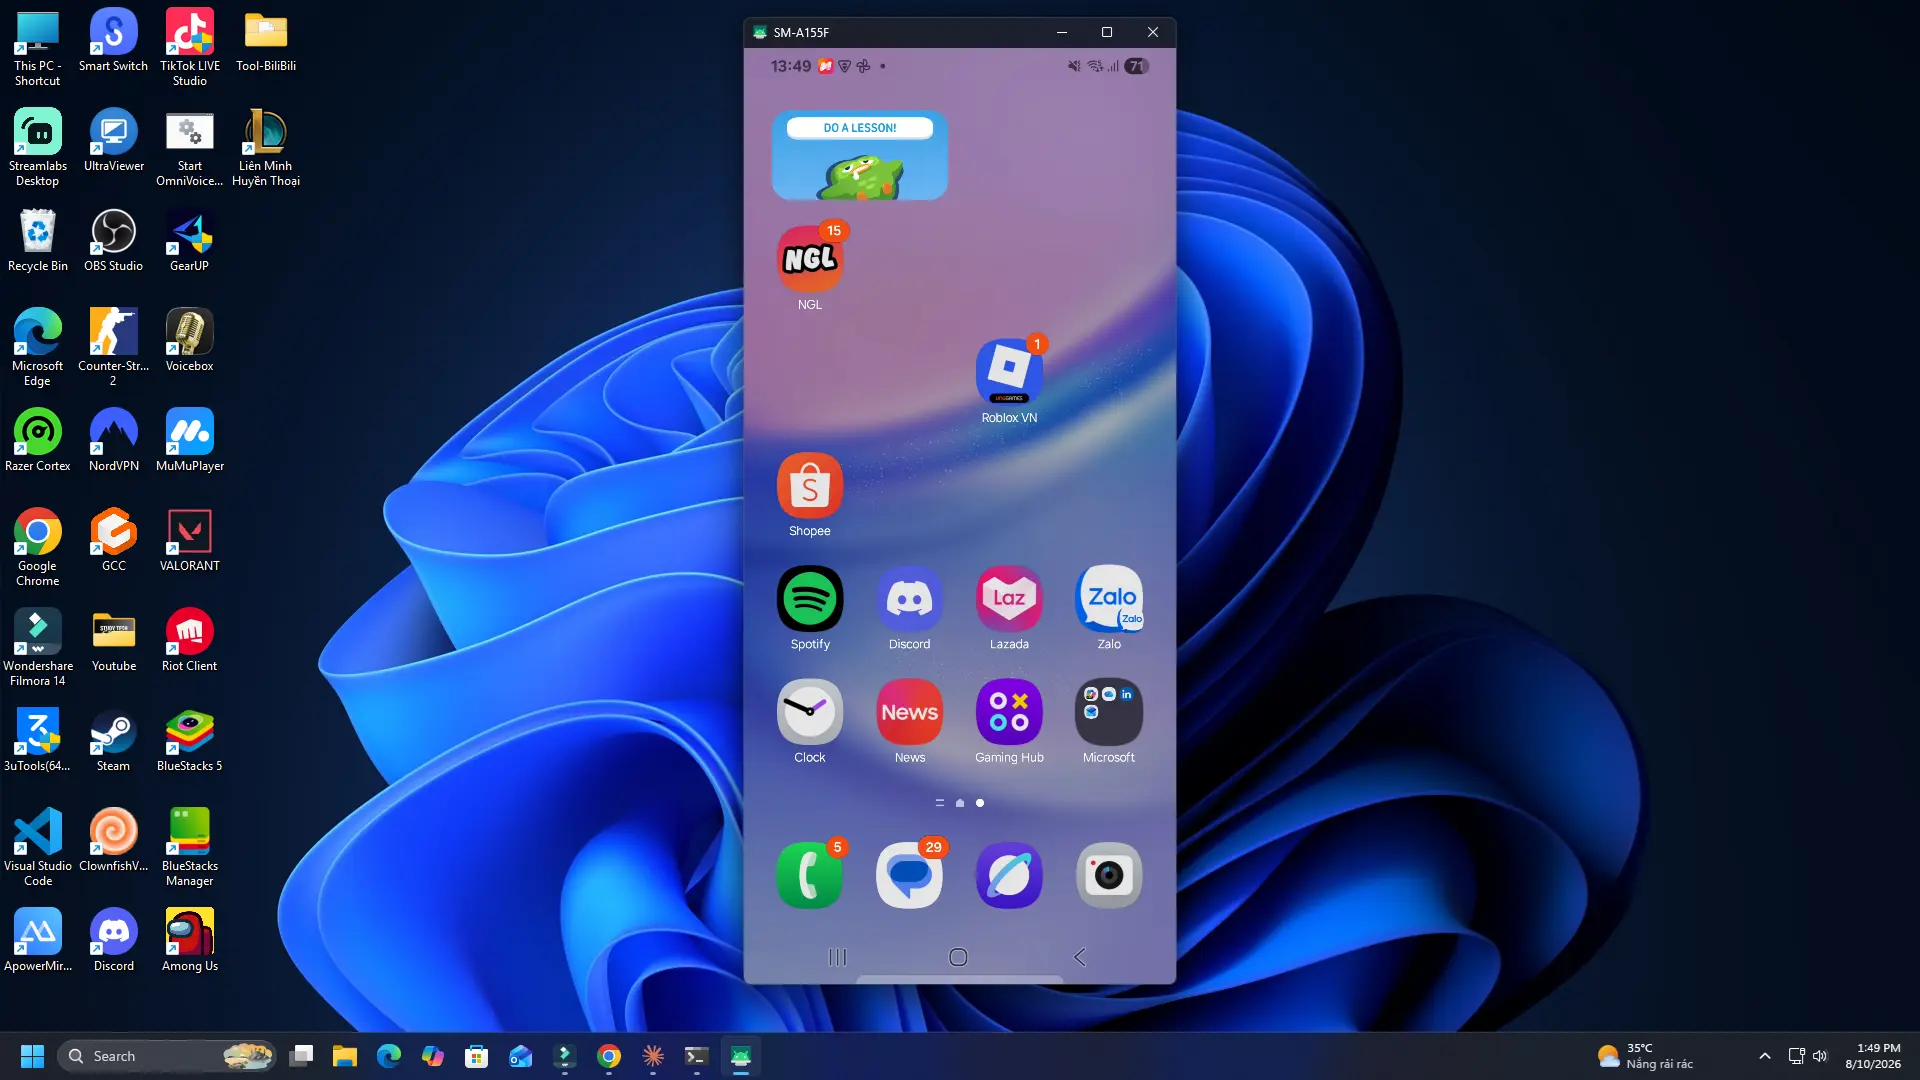
1 Before You Start
Wireless pairing relies on Android’s built-in Wireless Debugging feature, so make sure the basics below are covered before jumping into the steps.
| Requirement | Details |
|---|---|
| Android Version | Android 11 or later (required for Wireless Debugging) |
| Wi-Fi Network | Phone and computer must be on the same Wi-Fi network |
| Scrcpy | Free, downloaded from the official GitHub releases page |
| ADB | Included in the Scrcpy download — no separate install needed |
- Open Settings → About Phone.
- Find Build Number and tap it several times until you see a message confirming Developer Options are enabled.
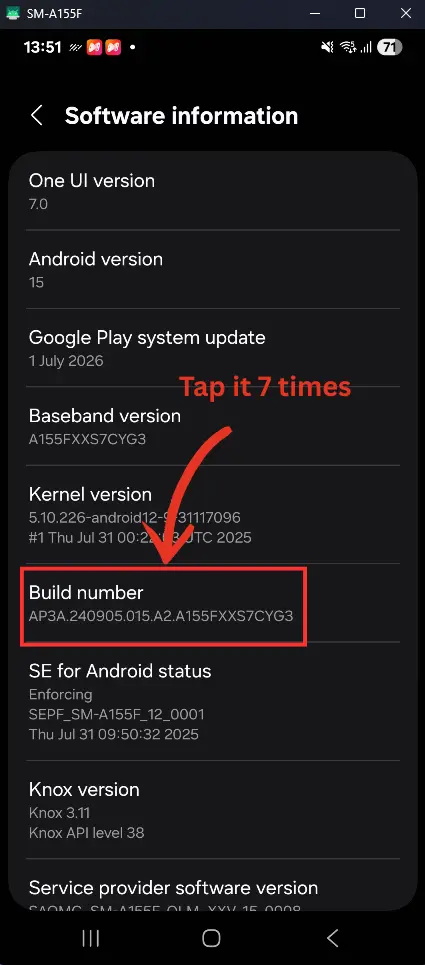
Tap Build Number repeatedly until the “You are now a developer” message appears.
- Go back to Settings → Developer Options.
- Find Wireless Debugging and turn it on.
- Tap into Wireless Debugging to open its settings screen.
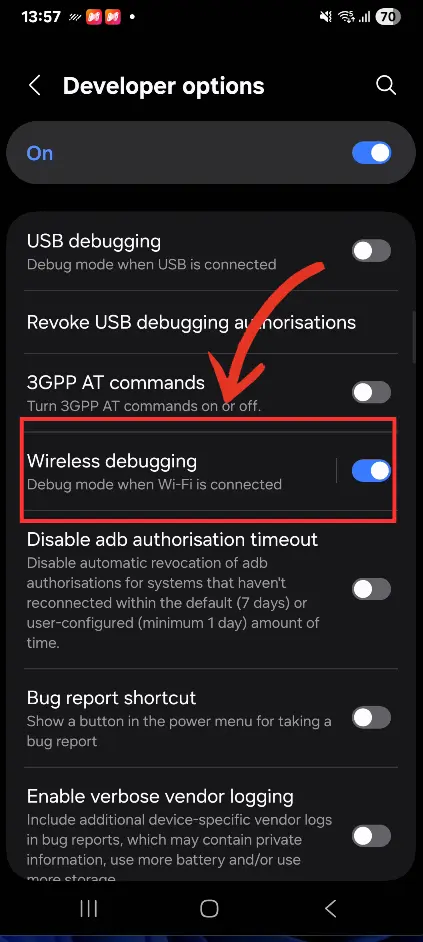
The Wireless Debugging screen shows your pairing and connection options.
- Make sure your phone and computer are on the same Wi-Fi network.
- Open Command Prompt (or Terminal) in the folder where Scrcpy is extracted.
- Type the following command and press Enter:
If ADB is working correctly, you’ll see version information printed back — this confirms you’re ready for the next step.
- On your phone, under Wireless Debugging, tap Pair device with pairing code.
- Your phone will display an IP address, a pairing port, and a 6-digit pairing code.
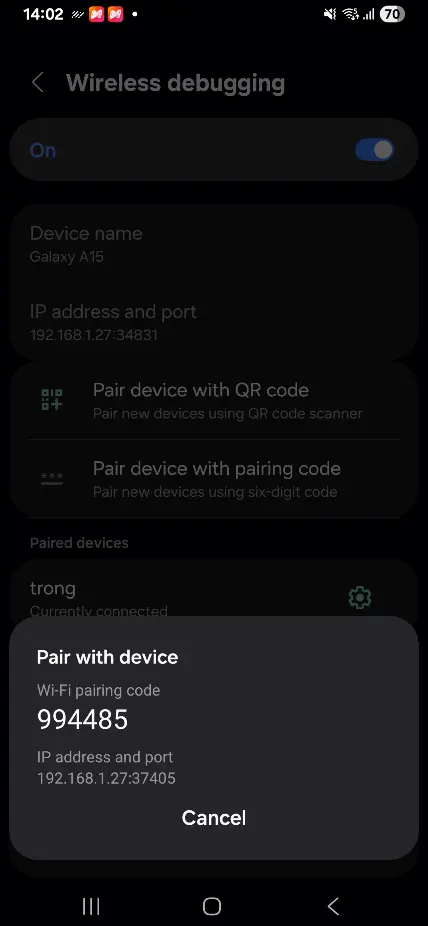
The pairing screen shows the IP address, pairing port, and the 6-digit code you’ll enter on your PC.
- On your computer, type the following, replacing the address with what your phone shows:
Press Enter, then when Command Prompt asks for the pairing code, type in the 6-digit code shown on your phone and press Enter again. You should see a message confirming the device was successfully paired.
The command above is just an example — always use the exact IP address and pairing port currently shown on your own phone’s screen, since both can change between sessions.
- Go back to the main Wireless Debugging screen on your phone (not the pairing screen).
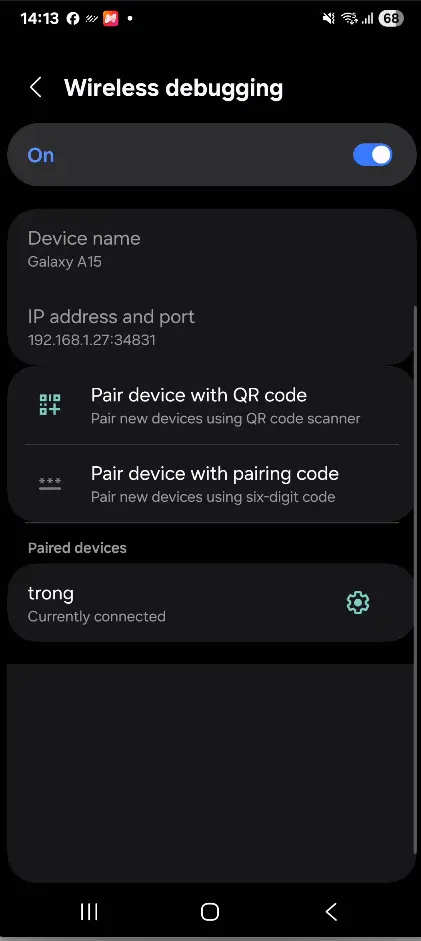
The main Wireless Debugging screen shows the IP address and connect port used for adb connect.
- Note the IP address and port shown here — this port is different from the pairing port used in Step 3.
- On your computer, type the following, using your phone’s actual IP and connect port:
If the connection succeeds, you’ll see a confirmation like connected to 192.168.1.27:34831. Next, confirm ADB can see your device:
Your phone should now appear in the list of connected devices, confirming the wireless connection is active.
With the wireless connection active, start Scrcpy from the same Command Prompt window:
Your Android phone’s screen should now appear in a window on your computer, fully controllable with your mouse and keyboard — no USB cable required.
If you have multiple devices connected via ADB at the same time, you can target this specific phone directly by including its address with the -s flag:
From this point on, you can control your Android phone from your PC entirely over Wi-Fi. Just keep in mind you’ll need to repeat the adb connect step (Step 4) each time you restart your phone or reconnect, since the pairing itself only needs to be done once.
7 Troubleshooting Connection Issues
If the wireless connection isn’t working, run through this checklist:
- Same network: Double-check your phone and computer are connected to the exact same Wi-Fi network, not a guest network or a different band.
- Wireless Debugging is on: Confirm the toggle is still enabled — it can turn off after a reboot.
- Correct IP and port: Make sure you’re using the IP and port currently shown on your phone, not an old one from a previous session — both can change.
- Re-pair if needed: If
adb connectfails outright, go back to Step 3 and re-pair using a fresh pairing code.
8 Frequently Asked Questions
adb connect with your phone’s current IP and port (Step 5) each time you want to reconnect wirelessly.
9 Conclusion
Here’s the quick recap of connecting Scrcpy wirelessly:
- Enable Wireless Debugging under Developer Options
- Pair once using
adb pair IP:PORTand the 6-digit code - Connect using
adb connect IP:PORT(a different port than pairing) - Launch Scrcpy with a simple
scrcpycommand
Once it’s set up, controlling your Android phone from your PC becomes as simple as opening a terminal and typing adb connect followed by scrcpy — no cable, no extra app installed on your phone, and no ongoing cost.
📱 Ready to Cut the Cable?
Download Scrcpy, follow the six steps above, and you’ll be mirroring your phone wirelessly in a few minutes.